1. Preparation
Clean the damaged alloy wheel area using the included alcohol cleaning pad. Remove any loose fragments, rough edges, or uneven surfaces around the damaged section.
2. Evaluate the Damage
For light scratches or small surface defects, use the wet sandpaper to smooth the contours of the affected area. Finish by applying the alloy silver paint to match the wheel surface.
3. For Larger Damage or Dents
If the damage is deeper or includes dents, use the repair adhesive. Squeeze the required amount onto the mixing mat. Blend the two adhesive components thoroughly with the spatula for a consistent gray mixture. (Complete mixing within 2–4 minutes.)
4. Fill and Cure
Apply the mixed adhesive to the damaged area until fully filled and slightly overflowing. Let it dry for approximately 15 minutes.
5. Shape and Refine
Use wet sandpaper to contour and smooth the repaired area to match the wheel’s original shape. Repeat adhesive application and shaping if necessary.
6. Paint and Final Cure
Clean the repaired section, then apply a thin, even layer of silver-gray paint using the brush. Allow the paint to rest for at least 12 hours and fully cure for 3 days before driving the vehicle.
Features
Provides a permanent, durable repair.
Easy to maintain and user-friendly for DIY application.
Heat resistant up to 130°C.
Vibration-resistant and fully washable after curing.
Includes complete accessories to perform repairs in as little as 30 minutes.
Effectively handles curb rash, scratches, minor dents, installation damage, and grinding marks.
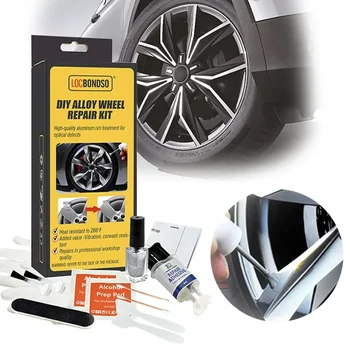
Package Includes
1 × Repair Glue (6 ml)
1 × Anti-Vibration Silver Gray Paint (5 ml)
1 × Sandpaper
2 × Gloves
2 × Cotton Swabs
2 × Brushes
2 × Alcohol Cleaning Pads
2 × Plastic Spatulas
1 × User Manual